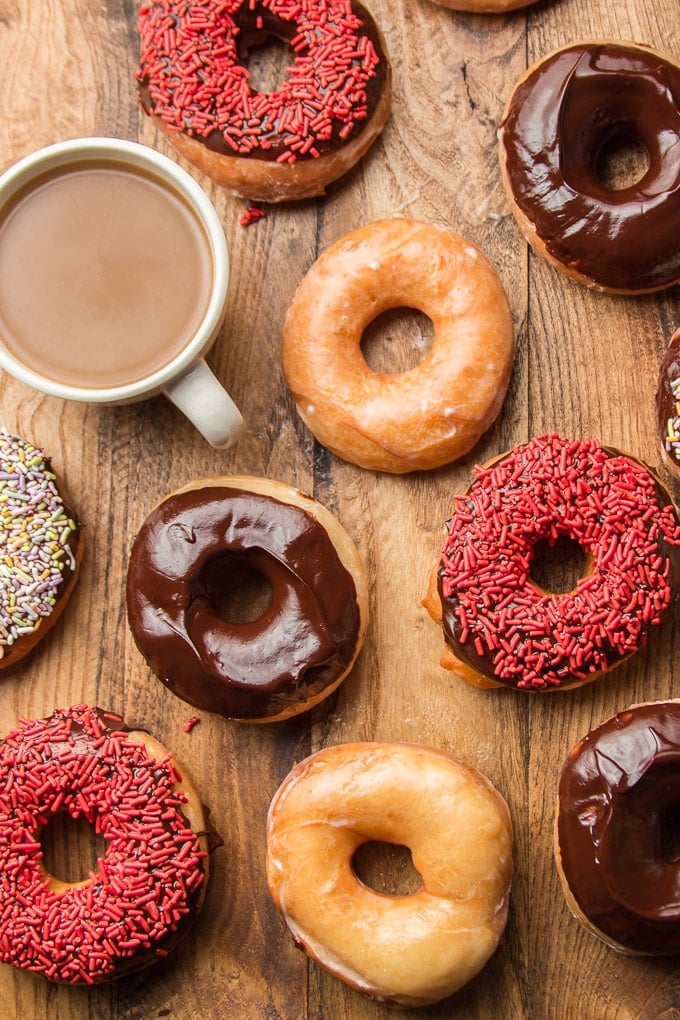
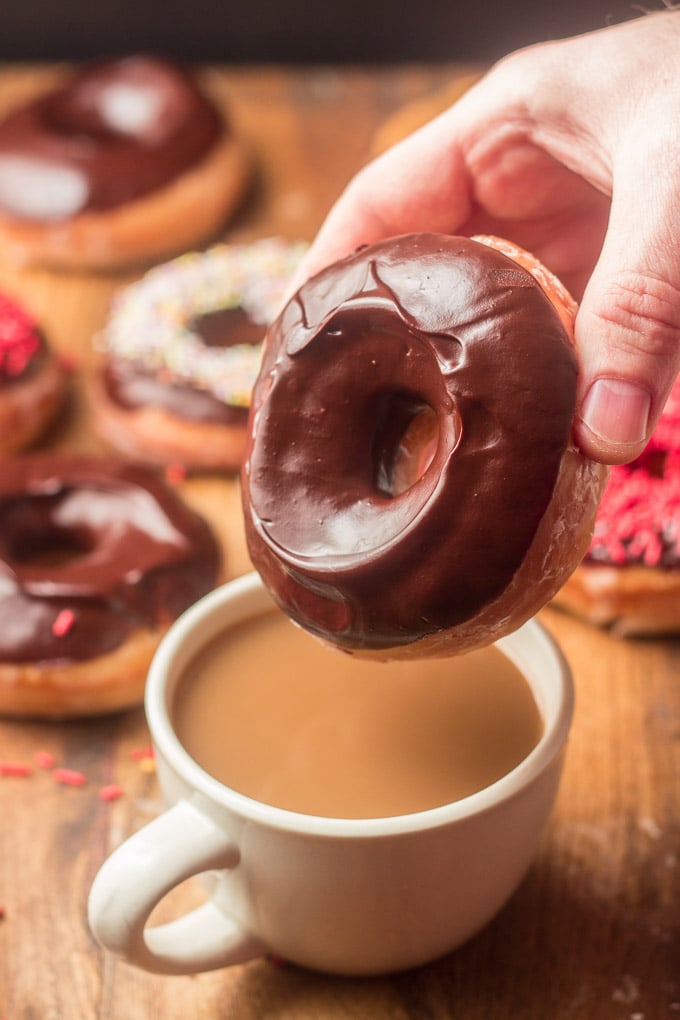
Soft, pillowy vegan doughnuts that taste like they came from a bakery! Made with yeast-risen dough and dipped in sweet vanilla glaze, these doughnuts will satisfy your cravings. Perfect with a cup of coffee!
Okay, so the internet already has a million and one recipes for vegan doughnuts. But almost all of them are for baked doughnuts. These are different — they taste just like they came from a doughnut shop. That's because they're made just like doughnut shop doughnuts!
Did you know that legit doughnut shop doughnuts aren't baked? My husband didn't. When I told him I wanted to make legit vegan doughnuts for once (for upcoming Fat Tuesday), he looked pretty confused. Like, don't you already have a bunch of recipes for vegan doughnuts?
Legit Doughnuts

In case anyone else didn't know, the doughnuts that you get at a doughnut shop or bakery aren't baked. They're fried.
No wonder those suckers are so good. And yes, I acknowledge the fact that frying isn't as healthy as baking, but we're talking about doughnuts, not some superfood power salad. So I fried them.
Also, legit doughnuts are generally yeast-risen (there are exceptions, like cake doughnuts). That's why the texture of baked doughnuts (typically leavened with baking soda or powder) is a bit different.
How to Make Vegan Doughnuts
Obviously these doughnuts are going to be a bit more work than doughnut-pan doughnuts. They're so worth it! Get started early in the day so your dough has plenty of time to rise.
Make the Dough
Start by warming up some non-dairy milk in a bowl or liquid measuring cup. Don't get it too hot or it will kill your yeast. Go with bath-temperature water. Add some sugar and whisk in a packet of yeast. Let it sit for about 10 minutes. It should get frothy during this time — if not, your yeast is dead and you'll need to start over with a fresh packet.

Now it's time to beat some vegan butter (softened to room temperature) and sugar together with an electric mixer. Next add some vanilla and salt, followed by that milk-yeast mixture. Beat everything together.

Now start beating in some flour. Add just a bit at a time. Before long you'll have a dough that's too thick for the mixer to handle — ditch the mixer and switch to a spoon.
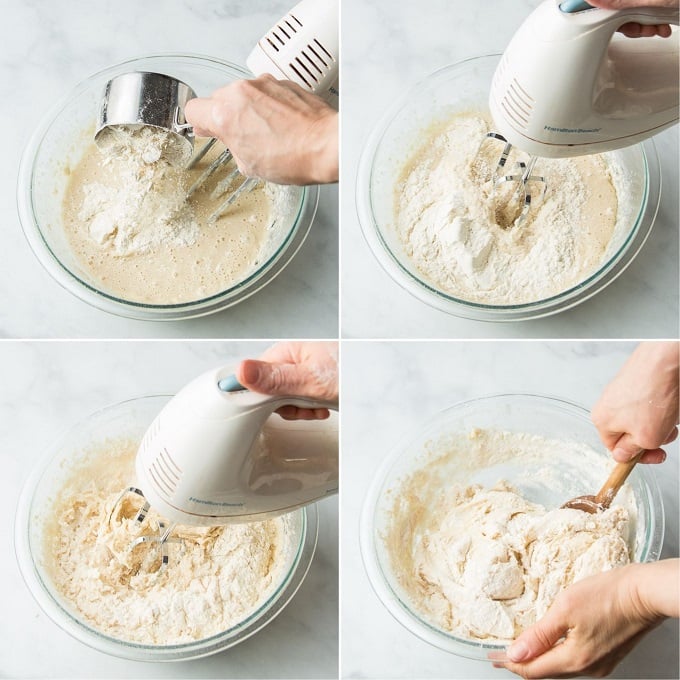
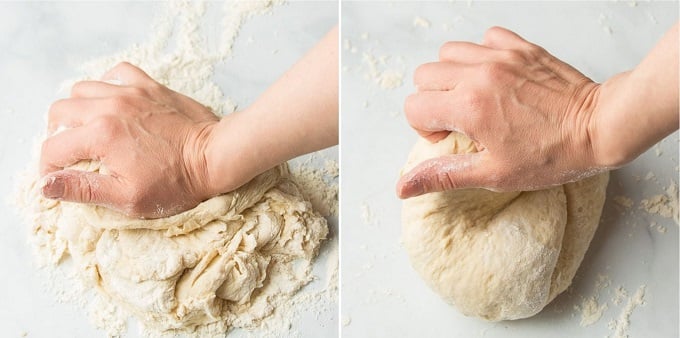
Once you've got your dough mixed, you'll need to knead it. Sprinkle some flour on the counter and work the dough for about five minutes, until it's smooth and stretchy.
First Rise
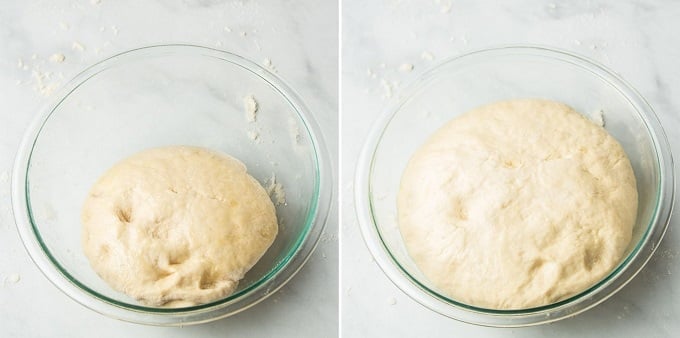
Coat a mixing bowl with oil, place the dough inside, and cover it with a damp towel. Place it in a warm spot in the kitchen to rise. I like to stick it in the oven with the light on for this. In about an hour or so (depending on the temperature), your dough will double in size.
Roll and Cut
Now it's time to make the doughnuts!
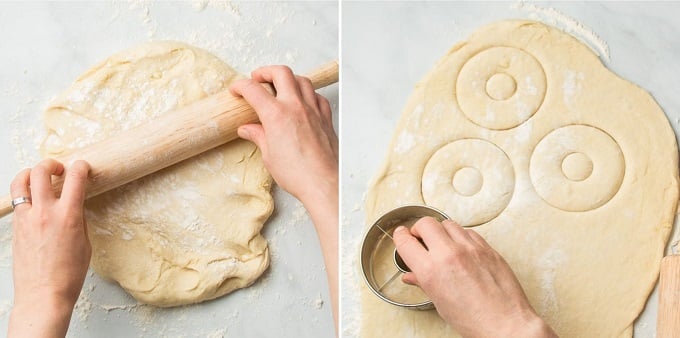
Sprinkle some more flour on the counter and use a rolling-pin to roll out your dough. You want it to be about ½ inch thick. Now cut it into doughnuts! I'm using doughnut cutters, but feel free to use biscuit cutters or a knife if you don't have any. You'll want something that's about 3 ½ inches in diameter.
Second Rise
Place your cut doughnuts on a parchment paper-lined baking sheet, cover them with a damp towel, and place them in a warm spot to rise again. Yes, this is the second time we're letting our dough rise!
Let your doughnuts rise until they puff up a bit. This should take 45 minutes to an hour.
Frying
Now for the fun part.
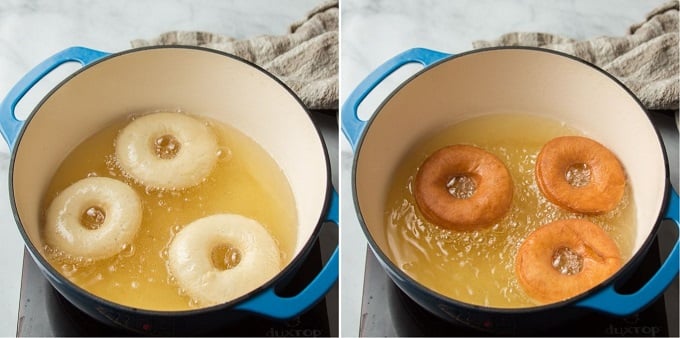
Use a large Dutch oven for this. Pour in some oil. Okay, pour in a lot of oil. You want it to be at least 1 ½ inches deep.
Now heat it up! This will take a few minutes. Use a deep-frying thermometer to monitor the oil temperature. When it reaches about 350°F, your ready to fry!
Fry a few doughnuts at a time, making sure not to crowd the pot. The doughnuts will float while they fry, so you'll need to do one side at a time, frying until each side is golden brown. This should only take a minute or two per side. If you saved your doughnut holes, fry them as well!
Transfer the fried doughnuts to a paper-towel lined plate.
Finishing the Doughnuts
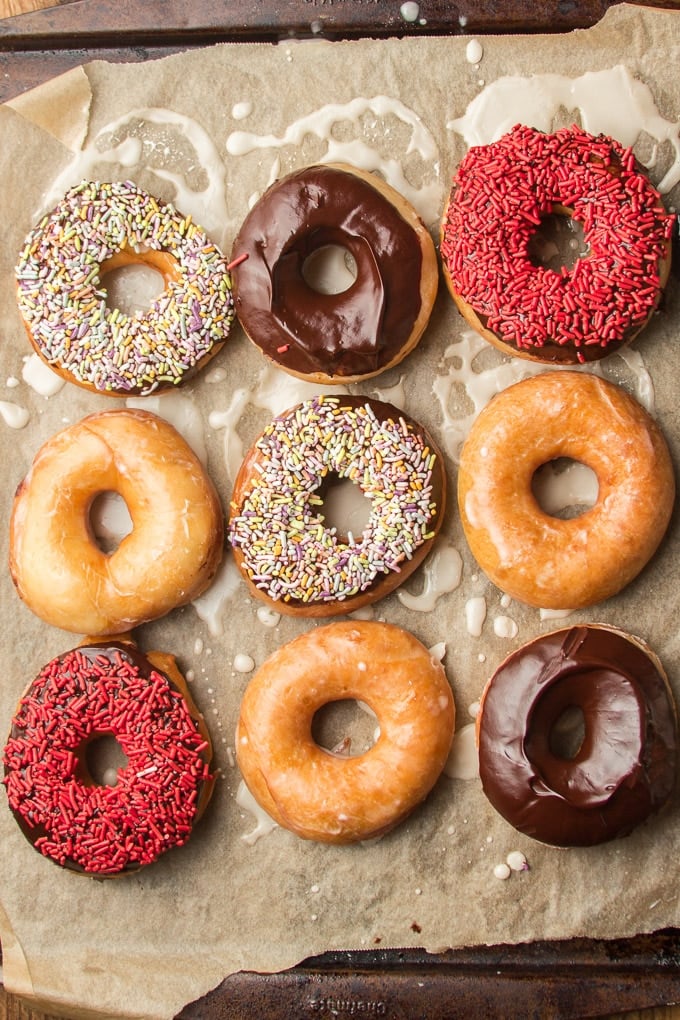
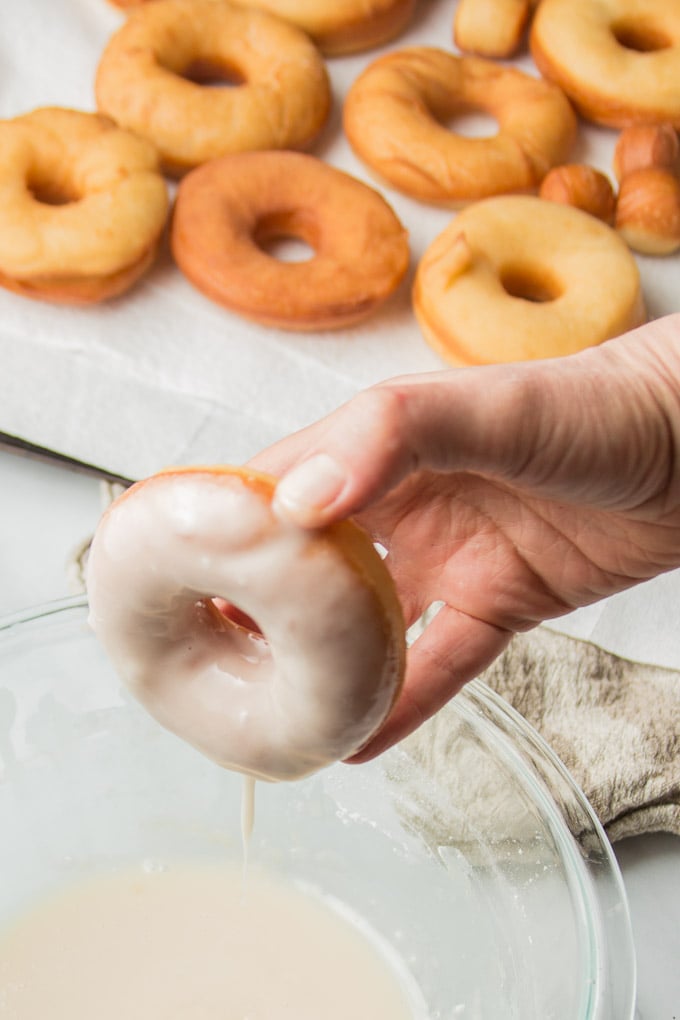
While the doughnuts cool, mix up some glaze and/or frosting. I made both!
When the doughnuts are cool, dip them both sides the glaze, coating the doughnuts all over.
If you'd like to frost them as well, let the glaze harden first, then dip the tops in frosting. Sprinkles add a nice decorative touch!
Vegan Doughnut Tips & FAQ
- Always use caution when frying! That oil gets super hot and can easily burn you.
- Never leave frying food unattended.
- Monitor the oil temperature closely.
- Be super careful to avoid splashing when placing things in or removing them from the oil.
- Don't pour your unused oil down the drain, as it can cause clogs. Dispose of it by placing it in a sealable container (such as the bottle it came from or an old coffee can), and place it in the trash. Alternatively, you can save it for later (an excuse to make more doughnuts). Oil can also be composted in small amounts.
- This recipe makes enough glaze and frosting to cover all of your doughnuts. Scale down as needed.
- Homemade doughnuts are best eaten the day they're made. You can get away with serving them a day later, but they won't be quite the same.
- Can I freeze my doughnuts? If you'd like to freeze your doughnuts, simply arrange them on baking sheets and freeze until solid. You can then remove the frozen doughnuts from the baking sheets and transfer them to sealed freezer bags. They should be good for at least 3 months. Again, they'll never be quite the same as they were on day 1, but they won't be bad!
- Can these doughnuts be made gluten-free? I'm afraid I'm not sure, as I have limited experience making yeast breads with gluten-free flours.
- Prefer a baked vegan doughnut recipe? I've got lots of them, here.
Like this recipe? If so, be sure to follow me on Facebook, Pinterest or Instagram, or subscribe to my newsletter. And please stop back and leave me a review and rating below if you make it!
📖 Recipe

Vegan Doughnuts
Equipment
- Rolling pin
- Doughnut or biscuit cutters
- Deep frying thermometer
- Dutch oven
Ingredients
For the Doughnuts
- 1 ¼ cup unflavored non-dairy milk, warmed to about 110°F
- 1 (7 gram) packet active dry yeast
- ¼ cup plus 1 teaspoon organic sugar, divided
- 6 tablespoons vegan butter, at room temperature
- 1 teaspoon vanilla extract
- ¾ teaspoon salt
- 4 cups all-purpose flour, divided (about 3 ½ cups for the dough, ½ cup for kneading and rolling), plus more as needed
- Canola or vegetable oil, for frying (you'll need at least 3 cups)
For the Glaze
- 3 cups organic powdered sugar
- ½ cup unflavored non-dairy milk
- 2 teaspoons vanilla extract
For the Chocolate Frosting (Optional)
- 1 cup vegan chocolate chips
- ¼ cup vegan butter
- 2 tablespoons maple syrup
Instructions
To Make the Doughnuts
- Whisk the milk, yeast, and 1 teaspoon of sugar together in a small bowl or liquid measuring cup. Set it aside for about 10 minutes, until frothy.
- In a large mixing bowl, beat the butter and remaining ¼ cup of sugar together with an electric mixer at high-speed until creamy, about 1 minute.
- Beat in the vanilla and salt.
- Begin adding the yeast mixture to the butter mixture, beating in a bit at a time at low speed. Be careful to avoid splashing.
- Begin adding flour, about ½ cup at a time, beating in each addition. Switch to a spoon when the dough becomes too thick for the mixer to handle. Continue adding flour until a soft dough forms (about 3 ½ cups total).
- Transfer the dough to a lightly floured work surface, and knead until smooth and elastic, about 5 minutes.
- Transfer the dough to a lightly oiled mixing bowl and cover it with a damp tea towel. Place the bowl in a warm spot to rise until doubled in size, about 1 hour.
- Punch the dough down, then transfer it to a lightly floured work surface. Roll the dough to about ½ inch thick.
- Use a doughnut cutter or biscuit cutter to cut the dough into doughnut shapes.
- Reroll the excess dough and repeat until all of the dough has been cut.
- Transfer the doughnuts to a parchment paper-lined baking sheet. Cover them with a damp tea towel and place the baking sheet in a warm spot to rise until puffy, about 1 hour.
- Fill a large pot or Dutch oven with 1 ½ to 2 inches of oil and place it over medium-high heat.
- Heat the oil to about 350°F. Use a frying thermometer to monitor the temperature.
- Add a few doughnuts to the oil, being very careful not to splash. Avoid crowding the pot.
- Let the doughnuts cook for 1 to 2 minutes, flip and cook 1 to 2 minutes more, until golden brown on both sides and puffy.
- Use a slotted spoon or tongs to remove the doughnuts from the pot. Transfer them to paper towel-lined plates to drain and cool.
- Repeat until all of the doughnuts are cooked.
To Make the Glaze
- Whisk all ingredients together in a small bowl. Add more powdered sugar if it seems too thin, more milk if it's too thick. You want it to be somewhat runny, but thick enough to coat the doughnuts.
To Make the Chocolate Frosting
- Melt the chocolate chips by microwaving in 30 second increments, stirring between each zap.
- Stir in the butter, until melted, followed by the maple syrup.
Finish the Doughnuts
- When the doughnuts have almost completely cooled, dip each one in the glaze, to coat both sides.
- Transfer the doughnuts to a wire rack for the glaze to set. I recommend placing a plate or paper towel under the rack to catch any drips.
- If you're frosting your doughnuts, wait for the glaze to fully set, then dip the tops in the frosting. Optionally top your doughnuts with sprinkles, nuts, or coconut.
- Allow the frosting to set, then serve.

Hi Alissa! Thanks! But why would you list 4 cups of flour without saying you reserve 1/2 for the counter at the begging! Like you did with the sugar!!!! I added 4 cups because I didn't even see the parenthesis until after re-reading the recipie foe the raising time :(
I guess they will be hard now :(
I totally get the confusion! The dough is meant to take about 3 ½ cups, added gradually. They’ll likely still turn out fine with 4 cups (there's always a range with recipes like this). Thank you for pointing this out. I've updated the ingredient list to help clarify.
I've used this recipe in the past and it's great! I made several different glazes and let my kids decorate. So fun and delicious! I wanted to know if I wanted to refrigerate overnight at any step so I could fry in the morning, where would you suggest? After cutting the doughnuts out then let rise in the morning?
I'm so glad you've been enjoying them! I haven't tried chilling the dough overnight, but I did hear from a reader that did with success. I would do up to step 7 the day before, then chill it in the bowl in the fridge. Let it come up to temperature on the counter the next day (maybe an hour), then proceed with the recipe.
My dough didn’t double in size :(
— although I did use instant yeast instead of active. maybe that’s why?
Sorry to hear that! The recipe should work with instant yeast, but it's possible that your yeast was dead. Did it get frothy in step 1? If not, you'd need to start over with a fresh packet of yeast. Other possibilities are that the liquid was too hot and killed the yeast, or the location you placed it in to rise was too cool (which will slow down rising, but not totally prevent it).
Oh my GOD. This recipe is so simple & easy to pick up and used entirely ingredients I had on hand. And they are DELICIOUS. They got so fluffy and fried so perfectly. I rarely comment on recipes, but this one was well worth going out of my way. I tossed mine in some cinnamon-sugar with a bit of ground cardamom and they're honestly to die for. This one is getting bookmarked and will be brought out whenever I want to wow someone. Thanks so much for posting this!
Doughnuts ended up super soft and lovely. I made half a batch with cocoa powder in the dough and that was great too.
A good sub for the chocolate frosting (there's no maple syrup where I live) was adding in some of the glaze along with the butter and cocoa powder for a good consistency that also tasted really good.
My nine year old is reading Alice in Wonderland for school. So, we had to have a tea party! She wanted doughnuts and strawberries for her sweet treat and we made these. They were super easy and turned out fantasticly! We dusted them with some powdered surgar. 10 of 10, would make again.
Thank you so much for an amazing recipe!
This recipe was a last-minute miracle! I wanted a treat to bring to a Romanian Orthodox church during the pre-Christmas period when observant folks eat vegan on certain days. I used to work in a donut shop and I can't believe these have the same texture/flavor as our regular dough full of dairy and eggs! Normally I have to workshop vegan recipes for ages before they come out how I want, but this one was perfect first try.
I made a couple of tweaks: prepared the dough the night before and let it rest in the fridge until morning, added some grated nutmeg, and added egg replacer equivalent to two eggs. (Egg replacer is in most specialty flour sections in the grocery store baking aisle and is very cheap, ~$5 for a bag that subs for 30+ eggs.) I used butter-flavored shortening and full-fat oat milk.
Highly recommend trying this recipe out, with or without my changes!
Hello, I might be losing my mind but what do you do with the 6tbs of butter? I couldn’t find it in the directions.
You beat it together with the sugar in step 2. :)
Can these be baked in the oven with a donut tray?
I haven't tried so I'm not sure. I do have a baked doughnut recipe though! It's here: https://www.connoisseurusveg.com/vegan-baked-doughnuts/
Can you freeze the dough prior frying?
I haven't tried it, but I generally have luck freezing yeast doughs, so I can't see why not! I'd recommend cutting the doughnuts and letting them rise before freezing.
Outstanding recipe. My mom is avoiding sugar and I'm vegan, so I'm always looking for new recipes to adapt to our mutual satisfaction. I was beyond tickled to find a vegan donut recipe that I felt confident omitting most of the sugar from and this one worked like a charm. I used 1tsp of regular sugar to proof the yeast the first time, then added 2tsp of regular sugar to the dough to ensure the yeast had enough to "eat" during the two long rises. For the rest of the sugar in the dough I subbed out 2tbsp of Truvia (the kind that comes in the little plastic tubs) and 2tbsp Stevia in the Raw (the kind in the big bag). The dough rose perfectly both times and the taste is phenomenal.
Also I didn't have a large round cookie cutter (only a small one about 1 inch in diameter) so I used a plastic cup to cut out the larger shape, then the smaller cookie cutter for the middle. I rolled some of them too thin which wasn't a huge deal, but they were much harder to handle when transferring to the oil and got a bit misshapen, which caused uneven cooking.
My cooked doughnuts had a bit of a crispness to the outside-- although that probably was because the temp wasn't right (I DROPPED my thermometer and it shattered into a billion pieces right as I was getting ready to cook so it was all guesswork). I finished the doughnuts in a blend of Truvia, Stevia in the Raw, and cinnamon. The "fake sugar" taste is definitely present but not overpowering. I tried to make a glaze with coconut oil, cocoa powder, and sugar substitute, but the granules didn't wanna dissolve so I scrapped it.
This is only my second time deep-frying anything but I can't wait to try this again. The end result is SO decadent and delicious, and this recipe makes a goodly number of doughnuts so they might stand a chance of lasting us until tomorrow. Maybe.
Thank you for such a great recipe! I love this site, it never misses!